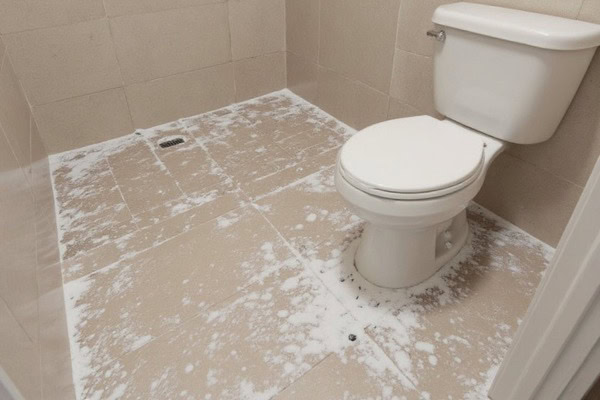
Soap scum might sound harmless, but it’s the sneaky villain lurking in your bathroom. This cloudy buildup forms when soap dances with hard water minerals and body oil, sticking to every surface it can find. Before you know it, your once-sparkling shower doors, ceramic tile, and porcelain tub turn dull and streaky.
It’s almost unfair that the same soap that gets you squeaky clean leaves behind a stubborn mess that can stain and even host bacteria or mildew. Ignoring soap scum doesn’t just ruin the look of your shower stall or glass doors; it can turn into a serious hygiene problem if left unchecked.
Ready to finally tackle soap scum and keep those surfaces gleaming? This guide breaks down smart DIY tricks, the best tools, and when to bring in the pros so you can say goodbye to that filmy layer for good.
Content
- 1 Why Does Soap Scum Build Up?
- 2 Essential Tools and Supplies for Removing Soap Scum
- 3 Step-by-Step DIY Methods to Remove Soap Scum
- 4 Preventing Soap Scum Build-Up in the Future
- 5 Say Goodbye to Soap Scum — Call Modern Maids for a Sparkling, Worry-Free Bathroom
- 6 FAQs
- 6.1 Is it safe to use vinegar on all bathroom surfaces?
- 6.2 How often should I deep clean to prevent soap scum?
- 6.3 Are commercial soap scum removers better than DIY solutions?
- 6.4 What is the best cleaner for heavy soap scum?
- 6.5 How do you remove years’ worth of soap scum?
- 6.6 Does vinegar and Dawn remove soap scum?
- 6.7 How to clean off stubborn soap scum?
Why Does Soap Scum Build Up?
Soap scum doesn’t just appear out of thin air. It’s the result of a chemical reaction between the fatty acids in bar soap and the minerals in hard water. When you mix that with body oil, dirt, and bits of dead skin, you get a sticky film that clings to your shower walls, glass shower doors, and even your porcelain tub. Over time, this mixture hardens, making it even harder to remove soap scum once it sets.
If your home has soft water, you might notice fewer soap scum deposits, but that doesn’t mean you’re in the clear. Using certain soaps or skipping regular cleaning can still lead to that dreaded white soap scum clinging to your surfaces.
Rough and porous materials, like some natural stone tiles, tend to grab onto soap scum more than smooth glass doors or a sleek ceramic tile wall.
The problem only gets worse in bathrooms with poor ventilation. When steamy showers leave surfaces damp for hours, soap scum finds the perfect opportunity to build up and settle in. Skipping deep cleaning sessions gives it even more time to turn into a solid, stubborn layer.
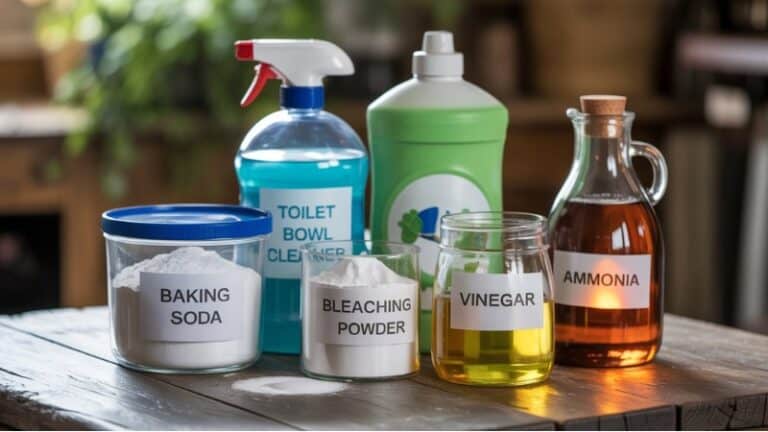
Essential Tools and Supplies for Removing Soap Scum
Before you jump into battle with soap scum, having the right tools makes all the difference. Here’s a handy checklist to get you started:
- White vinegar
- Baking soda
- Dish soap or a little dish soap
- Lemon juice
- Spray bottle
- Non-abrasive sponge or microfiber cloth
- An old toothbrush or a small scrub brush
- Squeegee for keeping glass shower doors streak-free after showers
- Rubber gloves to protect your hands
These everyday items are all you need to whip up a powerful homemade soap scum remover.
For those who prefer a grab-and-go option, there are plenty of brand-agnostic commercial cleaners labeled as the best soap scum removers. You’ll also find specially formulated products that work wonders on stubborn soap scum deposits and hard water stains without too much elbow grease.
Step-by-Step DIY Methods to Remove Soap Scum
Method 1: Vinegar and Dish Soap Solution

Step 1: Create the Solution
Nothing feels better than seeing that cloudy film disappear before your eyes. If you’re ready to make your bathroom shine again, start with a powerful yet simple combo: vinegar and dish soap. This dynamic duo can break down soap scum build and leave surfaces looking brand new.
To kick things off, grab your spray bottle and mix equal parts white vinegar and dish soap. Warming up the vinegar a bit before mixing boosts its power to dissolve those tough soap scum deposits. Once blended, you’ve got a homemade cleaner that works wonders on shower walls, glass shower doors, and even your plastic shower curtain.
This solution sticks well to vertical surfaces, making it easier to tackle soap scum without constant dripping. After you mix it, you’re just a few sprays away from a fresh, squeaky-clean bathroom.
Step 2: Spray Generously
Now that your vinegar and dish soap mix is ready, it’s time to put it to work. Think of this step as giving your bathroom a spa day, your surfaces deserve it.
Spray generously over every spot that shows signs of soap scum buildup. Target glass doors, shower walls, faucets, and those tricky corners around the shower heads. A good, even coat ensures the mixture can fully break down soap scum deposits instead of just sliding off.
Don’t be shy with that spray bottle. The more thorough you are, the easier it will be to remove soap scum later. Once your surfaces are covered, you’re well on your way to revealing the shine hidden underneath.
Step 3: Let It Sit
After all that spraying, patience becomes your new best friend. While it might be tempting to start scrubbing right away, giving the solution time to work is where the magic really happens.
Let it sit for at least 20 to 30 minutes. During this time, the vinegar and dish soap get busy breaking down tough mineral deposits, body oil, and those stubborn soap scum layers stuck to your shower stall or glass doors.
Feel free to catch up on a quick show or enjoy a cup of coffee while your homemade soap scum remover does the heavy lifting. When you come back, the grime will be much easier to wipe away, leaving you one step closer to that sparkling, squeaky clean finish.
Step 4: Scrub Gently
Once your cleaner has done its behind-the-scenes work, it’s showtime. This is when you step in and give those surfaces a little extra love.
Grab a non-abrasive sponge or a trusty microfiber cloth and start to rub in circular motions gently. This helps lift away the loosened soap scum without scratching your glass shower doors or ceramic tile. For those tight corners, grout lines, and tricky edges around faucets, an old toothbrush becomes your secret weapon.
Step 5: Rinse and Wipe Dry
Now that you’ve put in the elbow grease, it’s time for the grand finale. After scrubbing, give all the cleaned areas a good rinse with warm water. This helps wash away every bit of loosened soap scum and leftover cleaner.
Right after rinsing, grab a microfiber cloth or a paper towel and wipe everything dry. This step is key because letting surfaces air-dry can invite fresh soap scum deposits and water spots to settle in again.
Method 2: Baking Soda Paste for Tough Spots
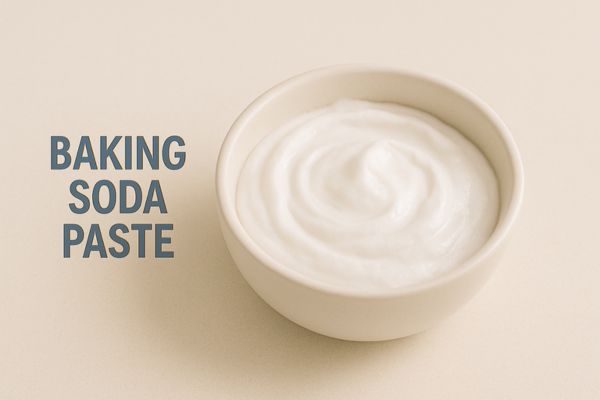
Step 1: Make the Paste
If soap scum is putting up a serious fight, baking soda steps in as your secret weapon. This everyday kitchen staple is loved for its mild abrasive power and ability to break down gunky build without scratching surfaces.
To whip up your baking soda paste, simply add a bit of water to the baking soda until it turns into a thick, spreadable mix. Aim for a texture similar to cake frosting so it stays in place on shower walls or glass doors.
This homemade cleaner is perfect for targeting those extra stubborn spots that vinegar and dish soap might miss.
Step 2: Apply to Stubborn Areas
With your paste ready to go, it’s time to zero in on those trouble spots. Imagine you’re frosting a cake, but this time, the goal is to banish grime instead of delighting taste buds.
Spread the baking soda paste over tiles, metal fixtures, and any places where soap scum is especially stubborn. These thick layers often hide around faucets, cling to shower walls, and coat the edges of tubs.
Cover each area generously so the paste can get to work breaking down those tough soap scum deposits.
Step 3: Let It Sit and Scrub
After spreading the paste, it’s time to give it a moment to work its magic. Think of this step as letting a good marinade soak in — the longer it sits, the better it tackles stubborn buildup.
Wait about 15 minutes to allow the baking soda paste to break down layers of soap scum and hard water deposits. Once the wait is over, grab a damp sponge or a soft brush and start scrubbing.
Use gentle, circular motions to lift away the loosened grime without scratching surfaces. Watching the gunk come off so easily is almost as satisfying as a brand-new bathroom reveal.
Step 4: Rinse and Dry
After scrubbing, it’s time to wash everything clean and admire your hard work. Rinse thoroughly with warm water until all traces of the baking soda paste disappear.
Next, grab a microfiber cloth or paper towel and dry every surface right away. This step keeps water spots and new soap scum from showing up too soon.
One important reminder: stay away from abrasive pads on delicate spots like acrylic tubs or polished fixtures. They can scratch the finish, making it easier for soap scum to stick in the future. A careful rinse and gentle dry will leave your bathroom surfaces looking clear and fresh.
Method 3: Lemon Juice for a Natural Shine

Step 1: Apply Lemon Juice
When you’re looking for a bright, fresh way to tackle soap scum, lemons come to the rescue. More than just a kitchen staple, lemon juice is loaded with citric acid that works wonders on stains and buildup.
Squeeze fresh lemon juice directly onto the areas where soap scum loves to linger, like shower doors, tiles, and metal fixtures. The natural acidity helps break down soap scum deposits while adding a fresh scent that makes your bathroom feel instantly cleaner.
Step 2: Let Sit
Once the lemon juice is in place, it’s time to let it do the heavy lifting for you. Think of this as giving the juice a chance to work its magic before you jump in.
Leave it on the surface for about 10 to 15 minutes. During this time, the natural acidity helps loosen soap scum without the need for harsh chemicals. You might notice the juice starting to cut through the film as it soaks in.
Letting it sit makes scrubbing easier later and helps ensure you don’t need to use too much elbow grease to see results.
Step 3: Scrub and Rinse
After the lemon juice has had its moment, it’s time to finish the job. Grab a soft cloth or non-scratch sponge and start scrubbing gently.
Move in small, circular motions to lift away the loosened soap scum without damaging surfaces like glass shower doors or ceramic tile. Once the grime starts to disappear, rinse everything with warm water to wash away the leftover juice and scum.
Step 4: Buff Dry
With everything rinsed clean, it’s time to add that final touch that makes all the difference. Think of this step as polishing a favorite piece of glassware; it’s all about the shine.
Use a microfiber cloth to buff each surface dry. This not only prevents new soap scum build but also gives you that streak-free finish that makes glass doors and tiles gleam.
Drying right away keeps hard water deposits from settling and helps maintain that fresh, clear look much longer. Your bathroom will look noticeably brighter and feel refreshingly crisp after this simple finishing move.
Preventing Soap Scum Build-Up in the Future
After all the effort to scrub away stubborn soap scum, keeping your bathroom clean should feel easy, not like starting from scratch every week. A few smart habits can help you enjoy that fresh, clear look for the long haul.
One of the most important steps is sticking to a weekly cleaning routine. Regular maintenance stops residue from combining with hard water minerals and turning into thick soap scum deposits. Focus on known hot spots like shower walls, faucets, and plastic shower curtains before buildup has a chance to settle in.
Keeping everything dry goes a long way too. After each shower, wipe down glass doors, tiles, and metal fixtures. Keeping a squeegee in the shower makes this a quick step that anyone can do in seconds.
Another big change is choosing the right soap. Switch from bar soap to liquid soap, body wash, or Castile soap whenever possible. These options usually skip talc and fatty acids, two major culprits behind soap scum build.
If hard water is part of the problem in your home, consider installing a water softener or a filtered shower head. Reducing mineral content makes it harder for scum to form and cling to your bathroom surfaces.
Alongside these tips, using a daily shower spray can help keep soap scum and water spots from appearing in the first place. Just a quick mist each day helps surfaces stay clear and shiny with almost no effort.
Quick tips to prevent soap scum:
- Wipe down wet surfaces after every use with a microfiber cloth or squeegee.
- Clean high-risk areas weekly before the buildup gets stubborn.
- Switch to liquid soap or body wash to reduce soap scum formation.
- Install a water softener or use a filtered shower head to tackle hard water minerals.
- Use a daily shower spray to keep surfaces streak-free and prevent new deposits.
With these small changes, you’ll enjoy a sparkling bathroom that feels fresh every time you walk in.
Say Goodbye to Soap Scum — Call Modern Maids for a Sparkling, Worry-Free Bathroom
Soap scum doesn’t just steal your bathroom’s shine; it turns simple cleaning into a frustrating chore and can quietly invite bacteria to stick around. With the right approach and a little elbow grease, you can win the fight and keep those glass shower doors, tiles, and faucets looking spotless.
Still, we know life’s too short to spend your weekends scrubbing soap scum off every surface. Why not kick back and let the pros handle the hard part? Modern Maids is here to make your bathroom sparkle from top to bottom, turning even the toughest soap scum build into a distant memory.
Leave the buckets and brushes to us, and enjoy more time doing what you love.
Call us at (469) 430 8860 or book your professional deep clean online today. A fresh, shining bathroom is just one Modern Maids visit away!
FAQs
Is it safe to use vinegar on all bathroom surfaces?
Vinegar works wonders on soap scum deposits, shower doors, and faucets, but it’s not for everything. Avoid using vinegar on natural stone surfaces like marble or granite since the acid can etch and damage them. Stick to vinegar and water solution or vinegar and dish soap mixes for ceramic tile, glass shower doors, and plastic shower curtains. Always test on a small spot first to be safe.
How often should I deep clean to prevent soap scum?
A deep clean once a week is the best way to prevent soap scum build-up and keep your bathroom looking fresh. Pair it with daily maintenance, like using a squeegee on shower walls and glass doors, to stop soap scum before it turns into a thick layer. A quick wipe-down only takes a few minutes and makes deep cleaning easier.
Are commercial soap scum removers better than DIY solutions?
Commercial soap scum removers can be powerful and specially formulated to tackle heavy buildup fast. However, homemade cleaner options using vinegar, dish soap, or baking soda paste work just as well for many people. DIY solutions are affordable, gentle, and let you avoid harsh chemicals while still helping you remove soap scum effectively.
What is the best cleaner for heavy soap scum?
The best soap scum remover often depends on how tough the buildup is. A mix of vinegar and dish soap works well for most cases, while baking soda paste is great for stubborn spots. For severe buildup on glass shower doors or a porcelain tub, a commercial cleaner labeled as the best soap scum remover can save time and effort.
How do you remove years’ worth of soap scum?
Removing years of soap scum build may take a few rounds. Start with a vinegar and dish soap solution or a baking soda paste. Let it sit for a few hours and scrub with a non-scratch sponge or soft brush. You might also need a pumice stone for tough mineral deposits, but always be careful not to scratch surfaces. Repeat until the surface is clear.
Does vinegar and Dawn remove soap scum?
Yes, vinegar and dish soap, especially blue Dawn, make a powerful duo for tackling soap scum deposits. When combined in a spray bottle, this solution can break down tough buildup on shower walls, glass doors, and faucets. Let it sit for at least 20 minutes, then scrub gently and rinse with hot water for the best results.
How to clean off stubborn soap scum?
For stubborn soap scum, start with a baking soda and vinegar paste or a vinegar and dish soap solution. Apply generously to the affected area and let it sit for at least 30 minutes. Then, scrub using a microfiber cloth or non-scratch sponge. Rinse with warm water and dry completely to restore a squeaky-clean shine and prevent future deposits.