
Bathroom Cleaning
Bathroom Cleaning Services You Can Trust
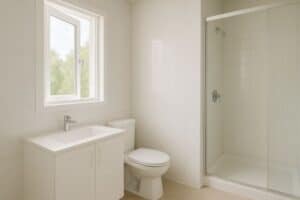
Your household bathrooms undergo frequent use throughout the week, and juggling the demands of family and work can make it challenging to combat soap scum and mildew. Modern Maids’ cleaning services offer a solution, helping you maintain a spotless restroom while freeing up your time to focus on the things that truly matter.
When you choose Modern Maids for routine housekeeping services, your bathrooms are included in the comprehensive package. Our committed professionals will thoroughly clean every aspect of your bathroom, addressing everything from removing cobwebs in room corners to washing or vacuuming the floors. Dusting services are meticulously performed in each bathroom, preventing the accumulation of dirt and germs on towel racks, toilet paper holders, blinds, windowsills, doors, doorframes, cabinet fronts, and even your baseboards.

Bathroom Cleaning Process
Cleaning the bathroom may seem like a daunting task, but with the right techniques and a regular cleaning schedule, you can keep your bathroom fresh and hygienic. Here’s a step-by-step guide to help you clean your bathroom effectively:
- Gather Supplies:
- All-purpose cleaner or bathroom cleaner
- Disinfectant
- Glass cleaner
- Toilet bowl cleaner
- Baking soda or a specialized abrasive cleaner
- Microfiber or disposable cleaning cloths
- Scrub brushes or sponges
- Rubber gloves
- Old toothbrush (for hard-to-reach areas)
- Declutter:
- Remove items from countertops, shower, and bathtub areas to have clear access for cleaning.
- Dust and Sweep:
- Dust light fixtures, vents, and any other surfaces.
- Sweep or vacuum the floor to remove loose dirt and hair.
- Pre-Treat Surfaces:
- Spray surfaces, including countertops, sinks, and the inside of the toilet bowl, with an appropriate cleaner. Allow it to sit for a few minutes to break down dirt and grime.
- Clean Mirrors:
- Use glass cleaner or a mixture of water and vinegar to clean mirrors and glass surfaces.
- Clean Countertops and Sinks:
- Wipe down countertops and sinks using an all-purpose cleaner or a solution of water and mild detergent. Pay attention to faucets and handles.
- Clean and Disinfect High-Touch Areas:
- Disinfect frequently-touched surfaces like light switches, door handles, and faucet handles.
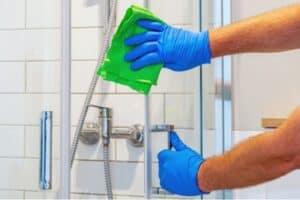
- Clean Shower or Tub:
- Apply a bathroom cleaner or a mixture of baking soda and water to the surfaces of the shower or tub.
- Use a scrub brush or sponge to clean tiles, grout, and other surfaces thoroughly.
- Clean Toilet:
- Apply toilet bowl cleaner inside the bowl and let it sit.
- Use a toilet brush to scrub the bowl, focusing on stains and under the rim.
- Wipe down the exterior of the toilet, including the flush handle.
- Clean Floors:
- Mop the floor using a suitable floor cleaner. Pay attention to corners and edges.
- Replace Linens:
- Replace used towels and bath mats with clean ones.
- Empty Trash:
- Empty the trash bin and replace the liner.
- Ventilation:
- Ensure proper ventilation by running the bathroom fan or opening a window to help prevent mold and mildew.
- Inspect and Repair:
- Take the time to inspect for any maintenance issues, such as leaky faucets or loose tiles, and address them promptly.
- Regular Maintenance:
- Establish a regular cleaning schedule to prevent the buildup of dirt and grime. Small, frequent cleanings are often easier than tackling a heavily soiled bathroom.
Remember to always follow the instructions on cleaning product labels, and use caution when combining different cleaning agents to avoid potentially harmful reactions. Additionally, wearing protective gear such as gloves is recommended during the cleaning process.
How Often Should You Clean Your Bathroom
The frequency of bathroom cleaning depends on several factors, including the number of people using the bathroom, personal hygiene habits, and the specific needs of the household. However, a general guideline is to clean the bathroom regularly to maintain a sanitary and pleasant environment. Here’s a suggested cleaning frequency for different tasks within the bathroom:
Daily:
- Surface Wiping: Wipe down countertops, sinks, and faucets daily to remove toothpaste, soap, and other daily-use items.
- Toilet Maintenance: Quick wipe down of the toilet seat and handle to remove any visible dirt. Swish the toilet bowl with a toilet brush.
Weekly:
- General Cleaning: Thoroughly clean countertops, sinks, and faucets. Clean mirrors and glass surfaces.
- Toilet Cleaning: Use a toilet bowl cleaner and brush to clean the inside of the bowl. Wipe down the exterior of the toilet.
- Shower or Tub: Clean the shower or tub, including tiles, grout, and fixtures.
- Floor Cleaning: Mop the bathroom floor.
Monthly:
- Deep Cleaning: Address specific areas that may not need weekly attention, such as grout lines, corners, and hard-to-reach places.
- Ventilation: Clean exhaust fan or vents to ensure proper ventilation.
Why You Need Bathroom Cleaning
Bathroom cleaning is essential for several reasons, primarily related to hygiene, health, and the overall well-being of individuals. Here are some key reasons why regular bathroom cleaning is necessary:
- Preventing the Spread of Germs: Bathrooms are hotspots for the growth and spread of bacteria, viruses, and other harmful microorganisms. Regular cleaning helps prevent the spread of germs, reducing the risk of illnesses and infections.
- Mold and Mildew Control: Bathrooms are often humid environments, providing an ideal breeding ground for mold and mildew. Regular cleaning helps control and eliminate these fungi, which can cause respiratory issues and allergic reactions.
- Odor Control: Accumulated dirt, grime, and bacteria can lead to unpleasant odors in bathrooms. Cleaning removes these sources of bad smells, contributing to a fresher and more pleasant environment.
- Surface Maintenance: Frequent cleaning helps preserve the condition of bathroom surfaces such as tiles, grout, sinks, and countertops. It prevents the buildup of stains, soap scum, and mineral deposits, extending the life of fixtures and finishes.
- Improving Aesthetics: A clean bathroom is more visually appealing and creates a more comfortable and inviting space. It can also positively impact the overall cleanliness and perception of your home or facility.
- Preventing Plumbing Issues: Hair, soap, and other debris can accumulate in drains over time, leading to clogs and plumbing problems. Regular cleaning can help prevent these issues and ensure proper drainage.
- Maintaining Safety: Wet and slippery surfaces in bathrooms can pose a safety hazard. Cleaning helps remove water spots, soap residue, and other slippery substances, reducing the risk of slips and falls.
- Promoting Mental Well-being: A clean and well-maintained bathroom can contribute to a sense of order and cleanliness, positively impacting mental well-being. It can also create a more pleasant and relaxing space for personal hygiene.
In summary, regular bathroom cleaning is crucial for maintaining a healthy and comfortable living environment, preventing the spread of diseases, and ensuring the longevity of bathroom fixtures and surfaces.