Let’s be honest—your shower head puts in work. But all that water flow? It comes at a price. Over time, hard water stains, mineral deposits, and even a little bacteria love to throw a party up there, leaving your water pressure weak and your shower a little… meh.
If you’ve ever noticed a clog, odd spray pattern, or that weird white crust creeping around the nozzle, chances are, your showerhead is begging for a cleaning. But before you panic-Google fancy tools or pricey cleaning hacks, don’t worry. There’s a simple, highly effective method sitting right in your kitchen.
Grab some vinegar, a plastic bag, and a few minutes of your time. This DIY trick is about to bring your bathroom back to life.
Ready to bring that water pressure back from the dead?
Stick around—we’re breaking down how to clean your shower head step by step, with nothing but vinegar and a little DIY magic.
Before You Begin: Supplies You’ll Need
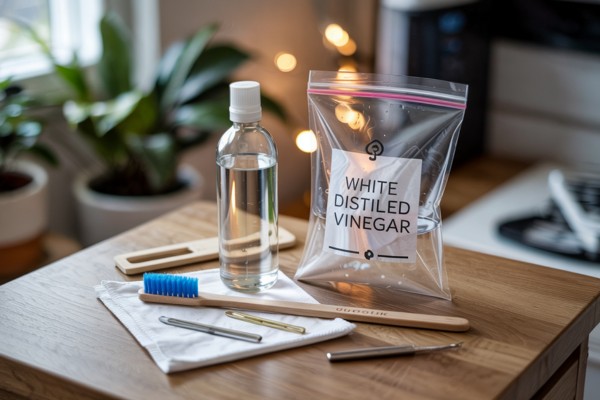
No need to dig through a toolbox—this is a low-effort, high-reward task. Before you start the vinegar cleaning process, gather a few household basics to make things quick and mess-free:
- White distilled vinegar – the hero of this method
- Plastic bag – zip-lock or grocery bag will do just fine
- Rubber band or twist tie – to secure the bag in place
- Old toothbrush or soft scrub brush – for gentle scrubbing
- Microfiber cloth – to wipe everything down afterward
- Toothpick or paperclip (optional) – for clearing out stubborn nozzles
- Warm water – for the final rinse
This method is safe to use on chrome, stainless steel, and plastic shower heads—no need to worry about damaging the finish.
Just grab your supplies, and you’re one step closer to reviving your water flow.
7 Step Method to Clean Shower head with Vinegar
Step 1: Inspect the Shower Head
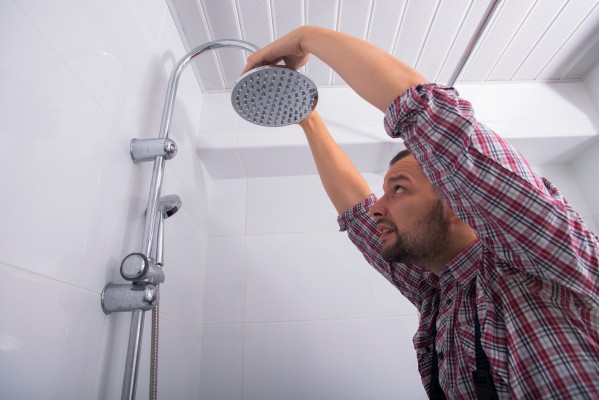
Start with a quick inspection—think of it like sizing up a job before grabbing your tools. If you’ve got a handheld shower head, you’re working with the easier version.
It usually detaches right from the hose, which makes soaking a breeze. Some rainfall models might also come off with a twist, so it’s worth checking if yours plays along.
Take a closer look at the surface and nozzles.
That chalky white stuff? Likely calcium deposits.
Reddish spots could be iron or bacteria making themselves at home. If it’s been a while since your last deep clean, these little signs can build up fast.
Give the water a quick test run. If the spray pattern looks off or some holes are barely working, that’s a classic sign of hard water buildup.
Depending on what you find, you can either keep it attached or go the extra mile and remove it for a more thorough clean.
Step 2: Fill the Bag with Vinegar

Skip the chemical aisle for now—your kitchen already holds the secret weapon.
White distilled vinegar isn’t just for salad dressing; it’s one of the most effective natural cleaners out there, especially when it comes to dissolving hard water buildup and limescale.
Grab a plastic bag—something sturdy like a zip-lock or even a recycled grocery bag will work. Fill it with enough vinegar to completely cover the shower head.
If you’re dealing with thick mineral deposits or that flaky white crust, don’t water it down—full strength is your best bet. For regular upkeep, though, a 50/50 mix of warm water and vinegar does the trick.
Picture this: instead of scrubbing away endlessly, you’re letting the vinegar do the heavy lifting.
It seeps into clogged nozzles and starts loosening up calcium deposits that could be affecting your water flow.
Now that your bag is prepped and your vinegar solution is ready, it’s time to bring it all together—literally.
Step 3: Secure the Bag Around the Shower Head
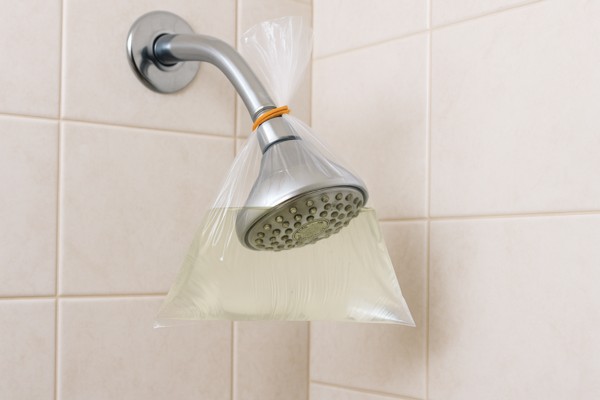
Now that your vinegar solution is ready to go, it’s time to turn your shower head into a mini spa.
Carefully slide the plastic bag over the shower head, making sure the nozzles are completely submerged in the liquid. The goal here is to let the vinegar soak into every little crevice where mineral buildup is hiding.
Once it’s in position, grab a rubber band, zip tie, or twist tie—whichever you have on hand—and wrap it tightly around the shower arm to hold the bag in place. If the setup feels wobbly, give it a gentle tug to check that it’s snug but not pulling on the fixture.
You don’t want to strain the pipe coming out of the wall or damage the threads.
If your shower head is detachable, there’s another route: place it in a bowl or bucket of vinegar for an even soak. This gives you more control and lets the vinegar reach stubborn areas from all angles.
Give it one last check—if everything is secured and fully covered, you’re all set to let the vinegar do its thing.
Step 4: Let It Soak
Now comes the part where you kick back and let vinegar do the dirty work. Think of it as a deep cleanse for your shower head—no scrubbing yet, just soaking.
Leave the head completely submerged in the vinegar solution for at least 30 minutes. For typical hard water stains and minor clogs, about an hour is ideal.
But if you’re dealing with heavy mineral buildup or hard water deposits that have been sitting for months, let it sit overnight for maximum results.
Here’s a heads-up: if your shower head is brass or gold-plated, limit the soak time to 30 minutes to protect the finish.
The acidity in vinegar is powerful—it breaks down calcium deposits and soap scum with ease, but it’s not gentle on delicate metals.
Using a removable metal head?
Another trick is to simmer it in a pot of white vinegar on the stove for 10–15 minutes. It’s a great way to speed up the process, especially when buildup is stubborn and time is tight.
Once the vinegar has had a few hours to work its magic, you’re one step closer to restoring strong, steady water flow.
Step 5: Remove the Bag and Scrub Residue
Once the vinegar has had time to work its magic, it’s time to unwrap the transformation.
Carefully remove the bag—go slow to avoid splashing—and pour the used vinegar down the drain. You might notice some grime or cloudy bits floating in the liquid. That’s the mineral buildup breaking down—gross, but oddly satisfying.
Now grab your old toothbrush or a soft scrub brush and gently go over the nozzles and outer surface. Pay close attention to areas where residue still lingers.
If some spray holes look blocked or crusty, give them a little extra attention.
Still seeing a stubborn clog?
A toothpick or a straightened paperclip works wonders. Just poke gently into the nozzle to loosen up any debris that didn’t dissolve during the soak. It’s the kind of detail work that makes all the difference in restoring full, even water flow.
Your showerhead should already be looking better—but we’re not done yet. Let’s move on to rinsing and finishing touches.
Step 6: Rinse and Run the Water
It’s time for the grand reveal.
Turn on the hot water and let it run for about one to two minutes. This step isn’t just a rinse—it’s a final flush to clear out any lingering vinegar, loosened mineral debris, or tiny bits of buildup that were shaken free during scrubbing.
As the water flows, watch for a change. You’ll likely notice a steadier stream, stronger pressure, and no more awkward spray angles. That’s your freshly cleaned shower head showing off its comeback.
Once the water runs clear and even, grab a microfiber cloth and wipe down the head to remove any remaining water spots.
A quick polish around the nozzles and outer shell helps bring back that clean shine—especially if you’re dealing with chrome or stainless steel.
It’s a small detail, but that final wipe adds a fresh, just-cleaned finish that makes your entire bathroom feel brighter.
Ready for the last step? Let’s seal the deal.
Step 7: Repeat Every Few Months
Don’t let all that hard work go to waste—keep your shower head in top shape with a little routine care.
While one deep clean makes a noticeable difference, sticking to a schedule helps prevent future clogs and keeps mineral buildup from taking over again.
Every 2 to 3 months is a good rule of thumb for most homes.
But if your water feels heavy with minerals or leaves spots on your shower curtain and fixtures, chances are you’ve got hard water. In that case, monthly maintenance can help avoid the return of calcium buildup and limescale.
Think of this as a long-term fix rather than a one-time chore.
Regular cleaning doesn’t just improve water flow—it protects the finish, prevents clogs, and helps your shower head last longer without a trip to the hardware store.
Let Modern Maids Keep Your Bathroom Sparkling
Knowing how to clean shower head with vinegar is a great trick to have up your sleeve—but tackling your entire bathroom? That’s a whole different game.
If soap scum, grout lines, and hard water buildup are eating up your weekend, we’re here to help.
Modern Maids delivers professional bathroom cleaning that goes beyond the basics. From scrubbing the shower head to wiping every wall tile, we handle the mess so you can enjoy that post-clean sparkle.
Ready for a bathroom that looks (and smells) brand new?
Call us at (469)-430-8860 or
Book online anytime: modern-maids.com/booking-page
Next time you step into the shower, don’t just feel clean—feel pampered.
FAQs
Can I mix baking soda and vinegar to clean a shower head?
Yes, you can combine baking soda and vinegar to clean your shower head—just be prepared for a bit of fizz. This combo is a great option for tackling hard water stains and mineral deposits. Simply fill a plastic bag with white distilled vinegar, add a tablespoon of baking soda, and tie it around the shower head. Let it soak for about an hour. The bubbling reaction helps break down stubborn residue, making it easier to scrub away buildup with an old toothbrush afterward.
What does vinegar do to a shower head?
Vinegar acts like a natural descaler for your shower head. It breaks down limescale, calcium deposits, and soap scum that build up from hard water over time. Soaking the head in white vinegar or a vinegar solution allows it to reach clogged nozzles, restoring proper water flow. It’s also gentle enough to use on most materials, including chrome and plastic. Just make sure your shower head is completely submerged and avoid soaking brass or gold-plated fixtures for more than 30 minutes.
Can hydrogen peroxide clean shower head?
Hydrogen peroxide can help with sanitizing your shower head, but it’s not as effective at removing mineral buildup caused by hard water. While it’s great for killing bacteria and mold, it won’t do much against thick calcium deposits or limescale. For that, white distilled vinegar is a better choice. If you’re looking to disinfect and deodorize after scrubbing off residue, you can rinse the head with warm water and then spray a hydrogen peroxide solution as a finishing touch.
How long to soak a faucet head in vinegar?
Soaking time can vary depending on the buildup, but generally, 30 minutes to 1 hour in white vinegar is enough for most faucet heads. If you’re dealing with visible hard water stains or stubborn mineral deposits, let it soak longer—just not overnight if it’s brass. For severe buildup, try using a bowl or plastic bag filled with vinegar and cover the faucet head completely. After soaking, scrub gently with an old toothbrush to flush out debris and restore a steady water flow.