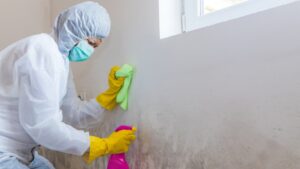
White walls have a way of making any room feel bigger, brighter, and beautifully put together—but let’s be real, they also attract every smudge, fingerprint, and random mystery mark like a magnet. While white paint adds a clean, crisp vibe, it’s not so forgiving when life gets a little messy.
Cleaning them, though? That’s where things get tricky. Scrub too hard or use the wrong cleaner, and you might dull the finish—or worse, lift the paint. But don’t worry, keeping those white walls spotless isn’t impossible. It just takes the right tools, a little know-how, and a gentle approach.
According to a recent homecare survey, scuffed walls and dirty baseboards rank in the top five things that make a home feel “unclean” to visitors. So if you’re aiming for a space that feels fresh and polished, your walls are a great place to start.
Ready to keep that bright, flawless look for the long haul? Let’s get into it.
Essential Supplies You’ll Need Before You Start
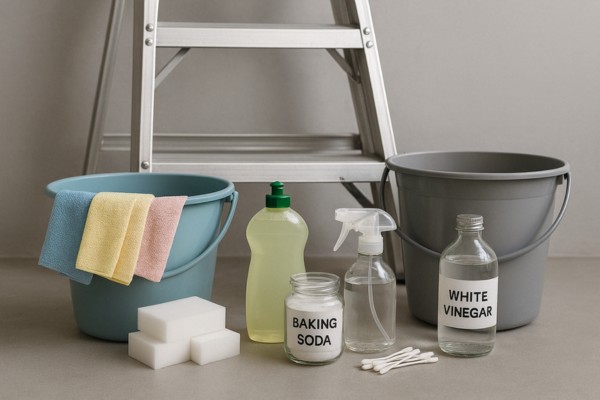
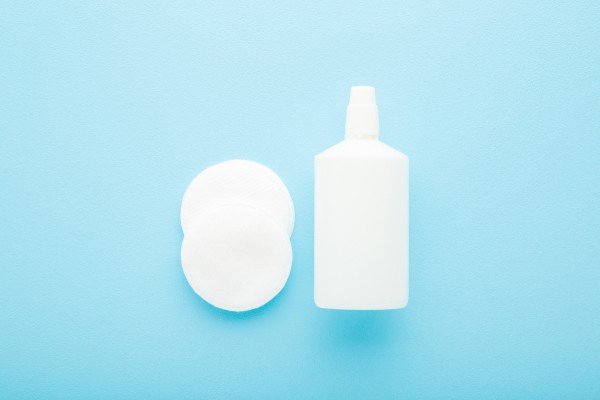
Before you tackle any stains or scuffs, it’s smart to gather all your cleaning supplies in one spot. Think of this as your go-to wall-cleaning toolkit—a mix of everyday items and a few optional add-ons that make the job easier (and more effective).
Here’s what you’ll want to have on hand:
- Soft microfiber cloths or clean rags
- Melamine sponges (like a Magic Eraser) for tough spots
- Two cleaning buckets—one for clean water, one for soapy water
- Mild dish soap for gentle, effective cleaning
- Baking soda (great for scrubbing power without damaging paint)
- White vinegar (helps with grease and dull spots)
- Spray bottle for controlled application of water solutions
- Cotton swabs for getting into trim and tight corners
- Ladder or step stool to reach ceilings and higher areas
- Optional: Touch-up white paint for those stubborn stains that just won’t budge
Before you start cleaning painted walls, always do a spot test with your chosen solution on a hidden area. This helps avoid any surprises like fading or peeling, especially if your walls have a glossy finish or older paint layer.
Once your supplies are set, you’re ready to bring those white walls back to life.
9 Effective Ways to Clean White Walls
1. Start with a Dry Dusting
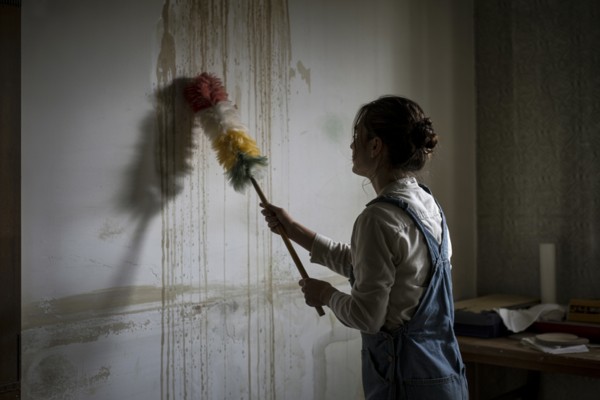
Before you reach for any spray bottle or soapy water, it’s best to start with a basic but essential step—dry dusting.
This first pass clears away the layer of loose dust, pet hair, and airborne debris that tends to settle quietly on your walls over time. If you skip this, wet cleaning can turn simple dust into streaks of grime.
Work your way from the ceiling down to the baseboards. It may feel backward to start at the top, but dust naturally falls as you clean—so going from the top down saves you from doubling your work.
A microfiber cloth, a Swiffer duster, or a vacuum with a soft brush attachment can all do the trick, depending on what you have on hand.
Corners near the ceiling and baseboards often collect hidden dirt or cobwebs, especially around vents or behind furniture. You can even use a clean, dry cotton swab for tight spots along the trim or in those tiny crevices where a cloth can’t reach.
If your cloth starts looking gray halfway through, give it a rinse in clean water and wring it out well before continuing. A dusty cloth won’t do much cleaning—just more spreading.
Dry dusting might not feel like a major step, but it’s what sets the stage for everything that follows.
Think of it like prepping a canvas before painting—your wall needs that fresh, dust-free surface to get the best results in the next steps.
2. Use Warm Water and Dish Soap (The Safest All-Around Option)
Let’s face it—dusting only gets you so far. When fingerprints start showing up near light switches, or you spot splatters from last night’s spaghetti near the dining area, it’s time to level up with some mild soapy action.
Your best bet for an everyday safe clean? A simple mix of warm water and a few drops of mild dish soap in a cleaning bucket. This gentle combo is ideal for painted walls, even those with matte or flat finishes that are typically more sensitive to harsh cleaners.
Dip a sponge or microfiber cloth into the soapy water, but make sure to wring it out until it’s just damp—too much water can cause streaking or seep into the paint. Use light, circular motions to wipe the wall, especially in stained areas like behind the kitchen trash bin or next to the kids’ snack zone.
Once you’ve wiped a section, go back over it with a clean, dry towel or cloth to soak up any moisture. This helps prevent streaks and water spots from forming on your otherwise spotless walls.
If you’ve recently painted your room, wait at least two weeks before using any soapy water to clean it. The white paint needs time to cure—otherwise, you risk dulling the finish or lifting the color entirely.
From greasy splatters to everyday smudges, this water-and-soap method is your go-to. It’s safe, simple, and works wonders with just a bit of elbow grease—no fancy solutions needed.
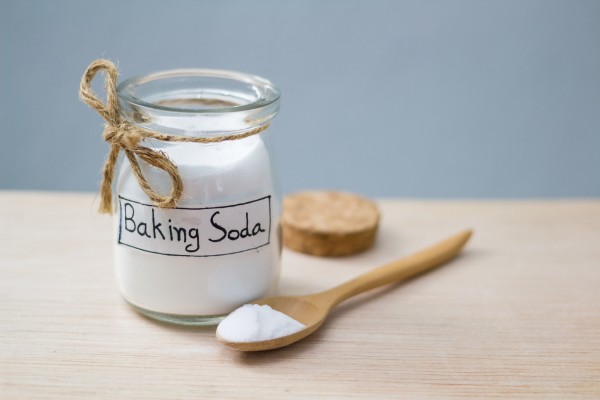
3. Try Baking Soda for Scuff Marks
Ever notice those mystery black marks near hallway corners or behind chairs?
Chances are, those scuffs came from sneakers, furniture, or just everyday bumps. When soapy water doesn’t cut it, baking soda steps in as the quiet hero of wall cleaning.
Baking soda is a gentle abrasive, which means it can scrub away grime without stripping the paint. To make your own baking soda paste, just mix a spoonful of baking soda with a small amount of water until it forms a thick, spreadable layer.
No fancy tools are required—just basic kitchen supplies.
Use a soft sponge or clean cloth to apply the paste directly onto the scuff mark, and gently scrub in circles.
There’s no need to press hard—let the mild texture of the paste do the work. Once the mark fades, wipe the spot with clean water and dry it with a towel to keep your white walls bright.
This method works great for things like shoe scuffs in entryways, chair marks in dining rooms, or even dark handprints near light switches. Just remember: always do a quick spot test before using the paste all over.
While baking soda is paint-friendly, every wall has its quirks—especially if it’s been a while since the last repaint.
When used with care, baking soda can turn even the grimiest stained areas into spotless surfaces again—no harsh chemicals, no regrets.
4. Use a Magic Eraser (With Caution)
Got a permanent marker masterpiece courtesy of your toddler or some mystery crayon art that showed up overnight?
This is where a Magic Eraser can feel like, well… magic. But as with all good things, a little caution goes a long way.
Melamine sponges, like the ones used in Magic Erasers, are slightly abrasive. That’s what makes them so effective at removing stubborn stains like ink, grease, or grime that other cleaners can’t touch. But the same quality that makes them tough on messes can also be tough on paint.
If your walls are painted with semi-gloss or gloss finishes, you’re in the clear to try one out. Just dampen the sponge, squeeze out excess water, and gently rub the stained area using light pressure.
Don’t scrub too hard—it’s not a gym workout, and your painted walls will thank you.
For flat paint, go slow. Always test the Magic Eraser in a hidden spot like behind a door or low corner. These finishes are more delicate and may lose their sheen if rubbed too aggressively.
Magic Erasers shine (pun intended) when cleaning white walls marked up by permanent markers, crayons, or even those weird streaks that come from moving furniture.
But avoid using them on shiny surfaces like varnished wood or polished trim—these areas can scratch easily, leaving behind dull patches that are more noticeable than the stain itself.
When used wisely, this little sponge can tackle big wall woes, but moderation and testing are key.
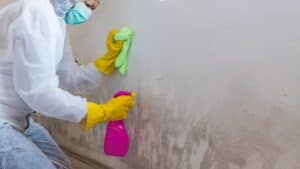
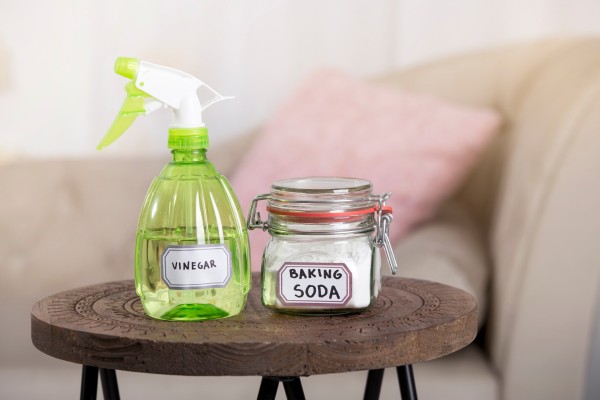
5. White Vinegar Spray for Grease or Yellowing
White walls in kitchens and high-traffic rooms often lose their brightness thanks to a mix of steam, food splatters, and greasy fingertips. Over time, what once looked crisp and clean can take on a dull, yellowish tone.
Thankfully, there’s an easy fix hiding in your pantry.
White vinegar is a natural cleaner known for cutting through grease, neutralizing odors, and gently lifting buildup without damaging painted walls.
To create a safe and effective spray, mix equal parts white vinegar and warm water in a spray bottle and give it a good shake.
Lightly mist the stained areas and let the solution sit for a few minutes to loosen up the grime. Wipe everything down with a damp cloth or sponge, then follow up with a dry clean rag to avoid streaks or water spots.
This method works especially well on greasy kitchen walls, around stove backsplashes, and in areas exposed to smoke or odors.
Whether you’re dealing with cooking residue or just general dullness, a quick vinegar spray can breathe life back into your white walls—no harsh chemicals required.
6. Hydrogen Peroxide for Mold or Mildew Spots
Noticed some sneaky dark spots creeping up behind your bathroom sink or along the corners where furniture meets the wall?
That’s likely mold or mildew, and it thrives in areas where moisture hangs around. Instead of reaching for harsh bleach, try a safer alternative that won’t make you cough or ruin your paint.
Hydrogen peroxide (3%) is an effective mold-fighter that’s tough on bacteria but gentle on your white painted walls—as long as you test a hidden area first.
Unlike bleach, it doesn’t release toxic fumes or leave behind harsh residue, making it a smarter choice for indoor cleaning.
Apply it directly to the moldy area using a spray bottle or damp cloth, and let it sit for 5 to 10 minutes to give it time to work. Then wipe clean with a dry cloth or clean rag. For more stubborn spots, you might need a second round, especially in places like behind bookshelves or in steamy bathrooms.
Keep in mind, hydrogen peroxide is best for solid surfaces. If mold has already settled into porous material like drywall or fabric, surface cleaning alone might not be enough.
But for painted walls that just need a refresh? This method is a low-effort, high-reward solution to bring back that spotless look.
7. Rubbing Alcohol for Ink and Sticky Residue
Ever peeled off a sticker only to find a tacky patch left behind? Or maybe someone got a little too creative with a pen near the desk?
These stubborn stains might look permanent—but with a little rubbing alcohol, they don’t have to be.
Isopropyl alcohol works well on ink stains, permanent markers, and adhesive residue, especially on smoother, painted surfaces. But since it can be strong, always start by testing a small, hidden spot on the wall first to make sure it won’t affect your paint finish.
Dampen a cotton ball or soft cloth with rubbing alcohol and gently blot the stained area—don’t scrub or press too hard. The goal is to lift the residue without disturbing the paint underneath.
Sticky areas left by tape, wall hooks, or labels respond well to this method, and it’s also great for random ink marks you find in offices or kids’ rooms.
Once the stain starts to break down, wipe the area with a damp cloth to remove any leftover alcohol, and dry it with a clean rag to prevent streaking.
With a steady hand and the right technique, those annoying marks can disappear without a trace—no repaint required.
8. Touch-Up Paint for Unremovable or Damaged Spots
Sometimes, no matter how careful you are—or how many cleaning supplies you’ve tried—a stain just won’t go away. Or worse, maybe a little too much elbow grease took some of the paint along with the mess.
That’s when it’s time to stop scrubbing and start touching up.
For marks that won’t budge or areas where cleaning left behind a dull patch, a light coat of touch-up paint can work wonders. If you have some of the original white paint stored away, you’re already a step ahead.
Otherwise, you can take a small sample (like a paint chip from behind a light switch plate) to your local hardware store for a near-perfect color match.
Use a small brush or foam roller to carefully apply paint just over the damaged or stained area. No need to cover the whole wall—just enough to blend it back to life.
For best results, paint a thin, even layer and let it dry completely before deciding if a second coat is necessary.
This approach is ideal for high-traffic areas like hallways, mudrooms, or behind the dining table—spots where wear and tear is practically guaranteed.
While it’s not a cleaning hack in the traditional sense, a quick touch-up can make your white walls look fresh and flawless again without starting from scratch.
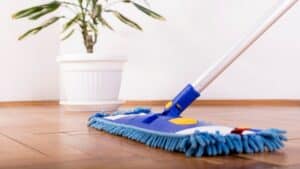
9. Clean Baseboards and Wall Trim
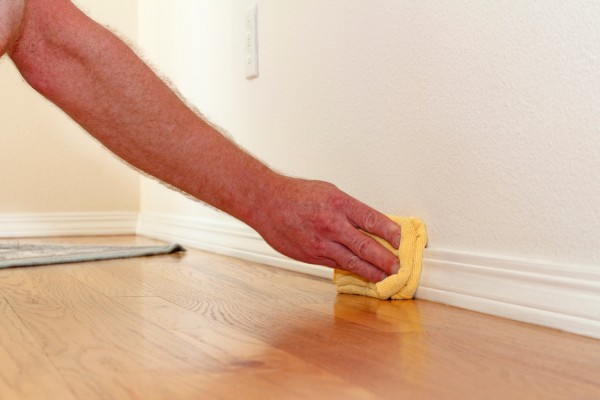
Even the cleanest white walls can lose their shine if the baseboards and trim below them are dusty or stained.
These overlooked edges tend to collect grime from mopping, foot traffic, and even pet fur—and they can instantly make a freshly cleaned wall look unfinished.
To bring them back to life, mix up a small batch of soapy water using mild dish soap or try a vinegar and water solution for a more natural approach. Dip a microfiber cloth or sponge into your cleaning bucket, wring it out well, and wipe along the length of the baseboards and trim.
Be sure to go with the grain and pay extra attention to corners and grooves where dust loves to hide.
Need more precision?
Use a toothbrush or cotton swab to get into narrow spots and carved trim details. Once cleaned, follow up with a clean damp cloth to wipe away any leftover soap or vinegar—this keeps the finish from becoming sticky or dull over time.
Whether you’re deep-cleaning or just refreshing the room, giving your baseboards and wall trim some attention completes the picture. It’s a small detail that makes a big difference, especially in bright rooms where even a little dust stands out.
Keep them clean, and your whole space will look sharper and more polished.
Let Modern Maids Help You Maintain That Fresh, Clean Look
Still, Googling how to clean white walls after your third attempt at scrubbing the same smudge? We’ve been there—and trust us, sometimes it’s just not worth the hassle (or the sore shoulders).
That’s where Modern Maids steps in. From baseboard cleaning to wall touch-ups and deep dust removal, our pros know how to make every surface shine—without the trial and error. Want that “just moved in” look without lifting a sponge?
Just select the wall cleaning add-on when you book.
Call us at (469)-430-8860 or breeze through the booking online: modern-maids.com/booking-page
Because your walls deserve better than DIY guesswork—and so do you.
FAQs
Does magic eraser work on white walls?
Yes, a magic eraser (or melamine sponge) can work well on white walls, especially when dealing with stubborn stains like scuffs, crayons, or permanent marker. However, it’s important to use it with caution—particularly on flat paint. Test a small, hidden spot first, as the sponge’s abrasiveness can cause dullness or even strip paint if overused. On semi-gloss or glossy finishes, it’s a quick way to refresh your walls without harsh chemicals—just remember to gently wipe and not scrub too hard.
What is the best way to clean white painted walls?
The safest method to clean white painted walls is using a warm water solution mixed with a small amount of mild dish soap. This gentle combo removes dirt, grease, and fingerprints without damaging the paint. For scuff marks, a baking soda paste or magic eraser may work, while vinegar is helpful for kitchen grease or smoke stains. Always start with dry dusting, then move to damp methods. No matter what, test any cleaning product on a small area first to protect the wall’s finish.
What kind of soap do you use to clean white walls?
To wash white walls safely, stick with mild dish soap—the kind you’d use on delicate dishes. Combine it with warm water in a cleaning bucket to create a gentle soapy water solution that lifts everyday grime without damaging the painted walls. Harsh cleaners or heavy-duty degreasers may strip the white paint or leave behind streaks. For best results, use a microfiber cloth to gently scrub, and follow up with a clean cloth to wipe off any soap residue and leave the surface clean and streak-free.